
Here is an excellent informational write-up by Dave Meyers about turbo removal and upgrade. These instructions and the "sweat and tears" advice will be of great benefit should you need to dissect your turbo for Upgrade/Overhaul/Replacement! --Doug
If
you choose to change the stock configuration of your Elan, you do
so at your own risk! In short, if you damage your Elan or
endanger your life as a result of something you read here, it is
your responsibility. Please use common sense.
Black Hole Performance (BHP) modified IHI/T3 Hybrid turbo
BHP installation kit
Copper gasket sealant
LocTite or other bonding agent for threaded parts
Airbox to turbo intake modification (see section below)
2’ of ¾” coolant hose (gas line also works)
Coolant
Mobil 1 Engine Oil (or other synthetic), new filter, drain plug washer
Penetrating oil (herein referred to as WD40)
Rubber vacuum caps (various sizes)
Sandwich bags, masking tape, and a permanent marker to label and keep parts separate
Optional/Recommended
Parts:
New exhaust manifold gasket
New turbine/O2 manifold studs (4 of varying length)
New turbo/exhaust manifold studs (5)
BHP block off plate for EGR intake plenum opening
BHP block off plate or BHP EGT bracket for exhaust manifold
2.5à2.25” turbo reducer hose
2.5” turbo hump hose
~2’ of custom bent 2.5” diameter piping
EGT gauge and probe
Air/Fuel meter
Open/Closed end wrenches
Socket set with deep and standard sockets
Universal joint for socket
Socket extension
Pliers
Screwdrivers
REMOVAL
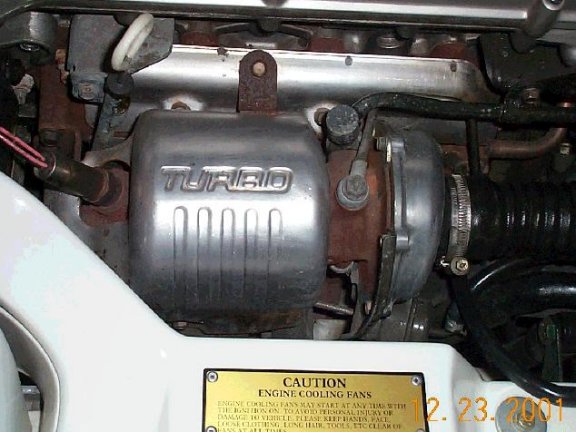 After disconnecting the battery, the first step is to raise
the whole front end. You will need
to get underneath for quite a few things. Also,
since you’ll be spending a lot of time under the hood, you might as well save
your back a little strain and have the project closer to you.
Chock the rear wheels and set the parking brake.
I usually lift the car at the rear mounting point of the lower wishbone
and place a jack stand at the stock lifting point behind the front wheel.
Once the car is safely up you will want to drain
your coolant (see Doug’s write-up) and it’s a good time to empty
the engine oil as well. Chances
are most will have drained from the turbo lines you will remove, but unless you
are already using Mobil 1 or an equivalent, you will at least have to change
engine oil. BHP will warranty the
turbo, but only if you are using synthetic oil. Once things are empty and the containers are out of the way,
place a protective cover, towels, a sheet or something over the front bumper of
the car and into the engine compartment. You
want to cover any painted pieces to protect them from nicks/drips.
You’ll also find the flat portion of the car in between the headlights
makes for a great tool resting place. Once
things are protected, remove the following pieces in order:
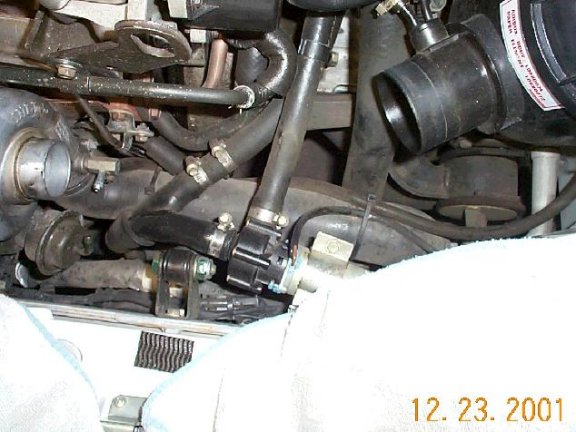
· O2 sensor – (US cars) First unclip the electrical connection to the left. This will allow the sensor to turn. Then either use a special O2 socket or a large pair of pliers on the sensor itself. Unless this has been previously removed, it will likely be very stubborn. Use lots of WD40 and let it sit. You could also try loosening it after the manifold is hot, but wear protective gloves and be very careful.
·
Air intake to turbo and lower intercooler (IC) pipe – Use a
screwdriver or 6mm socket to loosen the hose clamps and remove the air intake
first. This will allow you easier
access to the lower IC pipe. Cover
the turbo and IC intakes with plastic bags or rags and secure them with the
stock hose clamps.
· 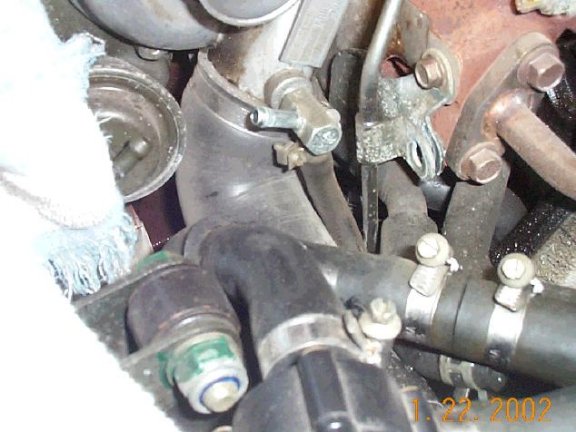 Pressure line from the turbo to the boost solenoid valve (BSV) –
This connects at the same place as the wastegate actuator line.
Remove the clip holding this line to the turbo, cut the zip ties holding
the line to the lower IC pipe, and tuck the hose somewhere out of the way.
·
(OPTIONAL) Remove the BSV and the vacuum switching valve (VSV)
that controls it. Note: The BSV is
a type of electronic boost control that allows for short periods of overboost
(up to .92 bar) in the stock car. If
you are replacing the turbo, it is likely that you will be making this unit
obsolete by controlling your own boost via MBC or EBC and will tune to your own
set boost level. The BSV attaches
to a bracket behind the airbox by (2) 12mm bolts.
Follow the other hose from the BSV to the VSV mounted to the right side
of the engine bay. It is a blue
topped piece (there are two of them mounted together).
Remove first the bracket that holds the units.
Then unscrew the VSV and remount the remaining unit. Follow the other vacuum line running from the VSV to the
throttle body. Remove this line and
replace it with a cap.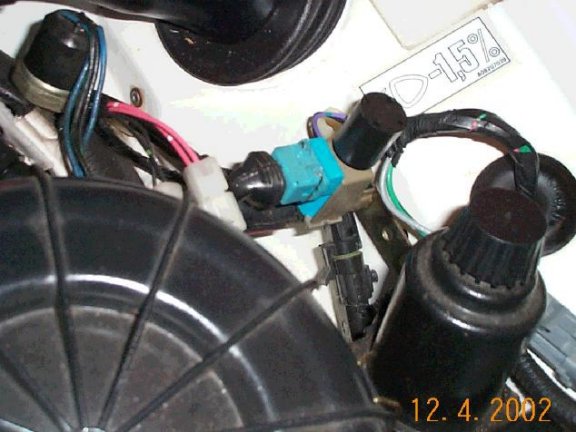
· Downpipe – (3) 15mm bolts at the precat. (2) 12mm nuts at the cat pipe flange. The only trick here is using a second wrench/socket at the opposite end of the bolt at the cat pipe flange. Otherwise the bolt running through the spring will just turn.
·
Heat shields for turbo and precat – These are held on by a
number of 10mm bolts, the turbo heat shield’s side-located bolt being the
toughest. This is where a long 10mm
wrench comes in handy. I ended up
buying a 10mm wrench, cutting one end off, and using a piece of ¾” conduit as
an extension. There is probably an
easier way, but necessity was the mother of an odd invention in my case.
I accessed the bolt from under the car while a friend held the wrench
onto the bolt from above with a long screwdriver.
It’s a real treat as you have just enough room to turn the bolt
approximately 5 degrees at a time.
·
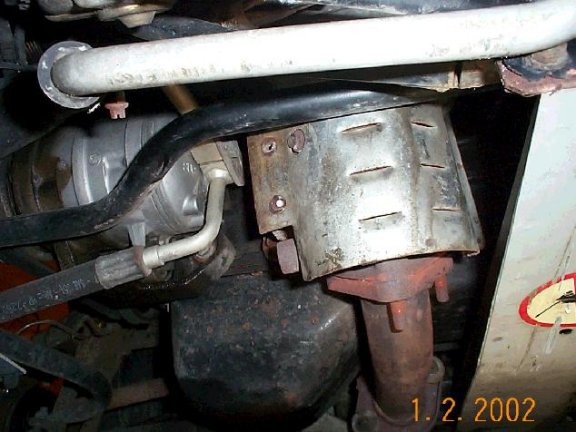 Precat – First remove the (2) 12mm bolts holding the precat to
the bracket. May as well remove the
bracket - (2) 12mm bolts - also for more room.
Then the (2) 12mm nuts and (4) 12mm bolts that connect the precat to the
O2 sensor. The universal joint
attachment for the socket is almost a necessity here.
Careful, it is heavy and could fall on your melon.
· Exhaust manifold heat shield – (2) 12mm bolts.
· (OPTIONAL) Send your manifold and turbo heat shields to Jet-Hot to be coated.
·
Coolant and oil lines to/from the turbo – 12 mm banjo bolt on
the top of the turbo for the metal oil feed and 14mm (?) on the block.
The supply hose also has a bracket held on by a 10mm bolt.
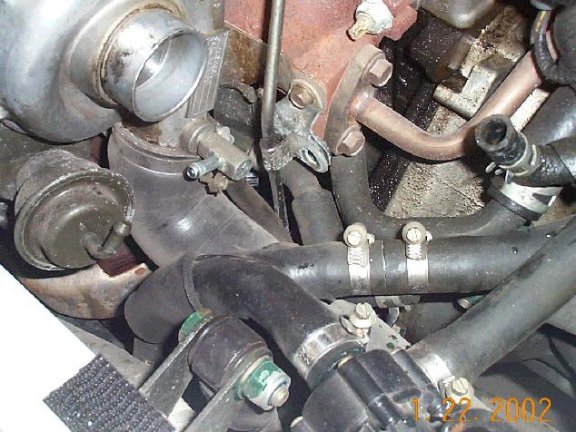 The coolant hoses attach on the top backside of the
turbo by (2) 14mm bolt and to the solid coolant lines by clamps.
Use pliers for these. The
oil return is rubber hose held by spring clips (which you will grow to hate if
you do much work in the engine compartment) at each end.
Cut approximately 10” of new coolant hose and install between the
coolant feed at the thermostat housing to the return to the right and below the
turbo compressor.
· Oil dipstick – Remove the bracket on the front of the engine by the 10mm bolt. Then use an open end 19mm wrench to remove the attachment at the engine block.
· Disconnect EGR pipe – (2) 12mm bolts at both right side of manifold and at the right side of the intake plenum. (see picture of turbo oil line bracket above) A 12mm bracket bolt in between may need to be removed to fully disconnect the EGR from the manifold.
·
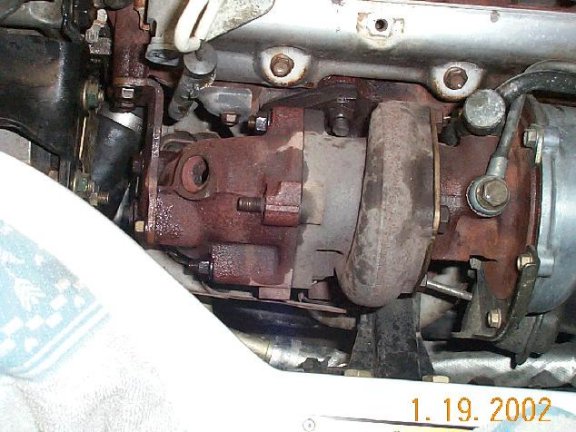 Black triangular piece mounted in front of the turbo – (2) 17mm
bolts. This is removed to allow the
turbo assembly room to come out.
·
Remove the O2 manifold bracket.
· Loosen power steering pump bracket – I had to shift this toward the front of the car to get the far-left manifold bolt off. Remove the bolt toward the rear (firewall side) of the bracket (12mm). It comes out from the left. The right side is a nut welded to the black bracket. After you remove the bolt, move the bracket up and forward as far as possible.
· Remove bolts on manifold studs – (9) 14mm
·
Remove as many of the manifold studs as needed to allow “wiggle
room” to get the turbo out – The manifold, turbo, and O2 housing all come
out as one piece (and it’s HEAVY). The
manifold studs are a T-40 Torx. Try
not to use anything else like a ¼” standard (which is close) or you’ll ruin
the end and need a new stud like I did.
Once the turbo assembly (exhaust manifold/turbo/O2 housing)
is out, you can either separate the pieces or just give the whole unit to Kyle.
I would recommend doing the latter as he can port the exhaust manifold
and the O2 housing to allow for better flow.
Otherwise separate the turbo from the other pieces.
(4) 12mm nuts for the O2 housing and (5) 14mm nuts for the exhaust
manifold).
Along with the BSV mentioned above, there are a number of
parts you can remove to save weight, “clean-up” the engine bay, or possibly
improve performance. I also
removed:
· The hook used to lift the engine out – (2) 12mm bolts
· The coolant lines running to/from the throttle body – You will need to install a piece of hose between the coolant feed at the thermostat housing to the return just below that housing. Remove the upper IC pipe for access to these parts. Cover the throttle body opening with a plastic bag and secure it with the stock clamp.
· The EGR assembly – Not recommended if you have emissions testing. You will need the BHP block off plates to cover the openings.
Basically the infamous “follow removal procedures in
reverse”. A number of notes,
however:
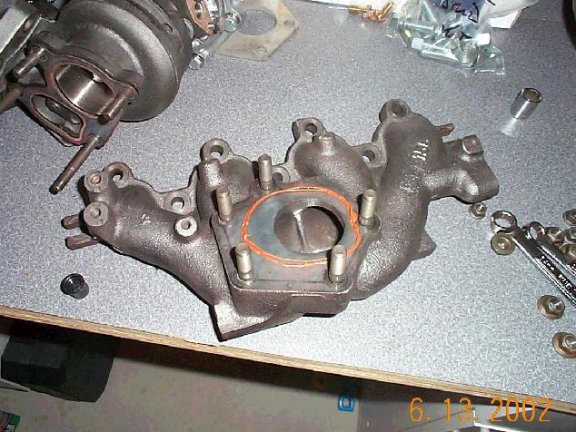
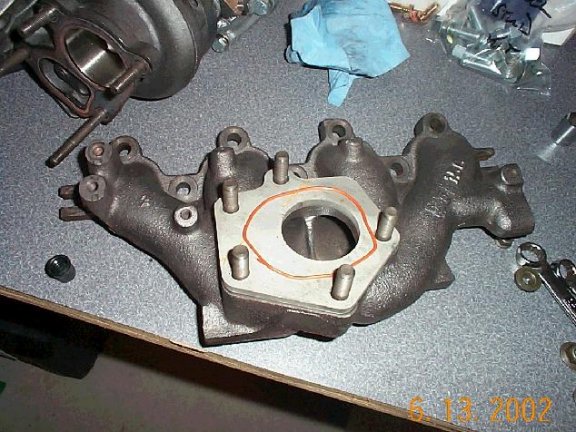
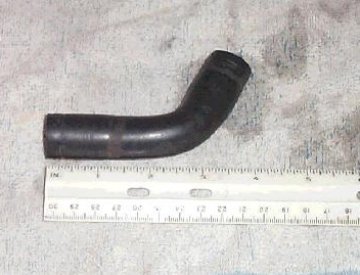
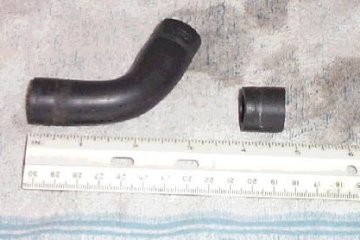
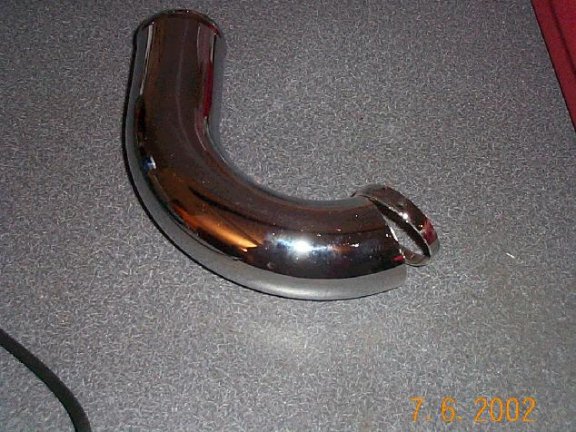
As for the intake piping, some modifications will have to
be done. The turbo input is now
2.25”, and the outlet is 2”. The
stock piping will not fit. As I
write this, Kyle has apparently developed a medication to the stock lower IC
pipe as part of the install kit. Another
option is the old Isuzuperformance pipe. This
will fit with only some minor cutting to provide a different angle at the turbo
connection. Another possibility would be to buy (2) 2”, 90-degree turbo hose
connectors and source some 2” diameter pipe for in between.
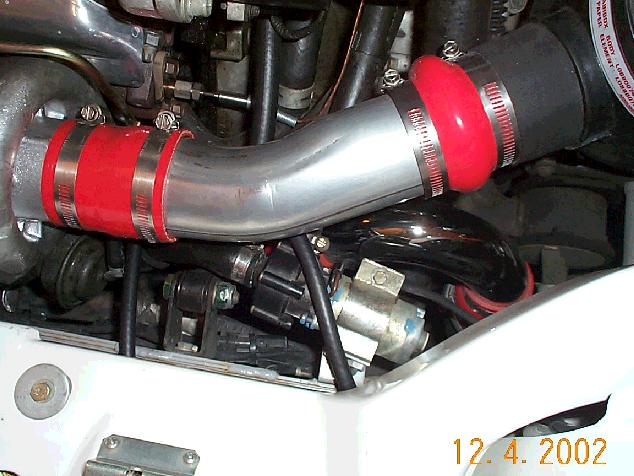 For the inlet from the airbox, I had a piece of 2.5”
exhaust pipe bent to the stock angle. I
used a piece of 2.5à2.25”
turbo “reducer” hose to connect at the turbo end. At the airbox, I first popped the plastic piece that leads
into the airbox out. I removed the
2-hose fitting that led to the oil separator and the BSV, cut away most of the
plastic mounting point…
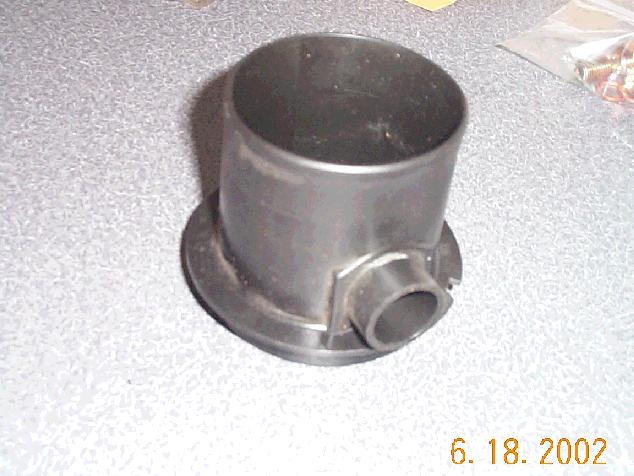 …and sanded it flush with a Dremel, then cut a piece of
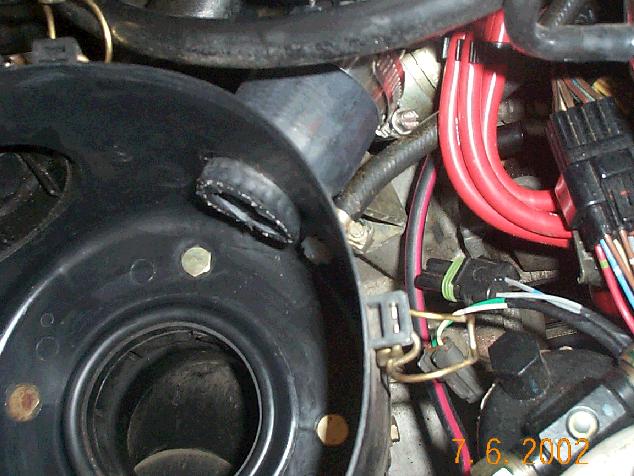
black 2.5” turbo hose that came in the BHP kit so it would slide over the hole
in the airbox fitting. I made sure
this piece allowed enough room to connect another piece of turbo hose from this
to the new intake pipe. For this
connection I used a piece of turbo “hump hose” to allow some movement
between the turbo (flexible mount with the engine) and the airbox (solid mount
to the body). To still connect the
oil separator breather, I made a small hole in the airbox, ran a barbed fitting
with a wide base out from the inside, and connected the hose.
This inlet is merely a temporary solution as I plan on a proper cold air
intake in the future.
 If you have merely removed and replaced the stock turbo, or
have made another modification and retained the stock compressor housing, none
of the custom steps above are necessary.
Once you have everything installed, triple-check all your
connections and hoses. Replace the
engine oil and coolant. Reconnect
your battery and start the car. Check
all connections for leaks. If
everything looks OK, turn off the car, lower the front end, and go enjoy your
new turbo!
A word of caution:
Even if you run stock boost, the BHP T3/IHI hybrid will flow much more volume
and therefore require more fuel. When
you decide to turn up the boost via MBC or EBC (and you will!), at very least
learn to datalog with ElanScan
and have a good air/fuel meter and EGT to monitor things.
On stock injectors, this turbo has the capability to seriously damage
your engine. I am currently
running 550cc/min injectors and a 3-bar MAP sensor and have found the limit
of pump gas even with a very rich fuel mixture (10.5:1).
Be sure to tune in small steps. But
that’s a whole other discussion…
If you run into anything I didn’t mention, let me know as I’m going from memory and might be forgetting something. It’s not real difficult (proof: I did it), just take your time, label everything, and take lots of notes.
Please contact me for any other information at David
R. Meyers.
These comments by Philip Brown who has done the procedure on his own as well:
Wow, excellent write-up, Dave! Must admit I come from the much less
meticulous "look at the engine, decide what needs to come off next...take
it off...look at the engine...repeat" cycle!
A few warnings to those who follow:
- DON'T think that this is a solo project for anything less than several LONG
weekends.
- DON'T follow the Lotus service notes for turbo removal - the order in which
things seem to need to be done appears to be impossible (inaccessible bolts).
Interestingly my new turbo was also only warranted if I used fully synthetic,
and Mobil 1 15W/40 was specifically recommended (not the 0W/40 stuff though).
After the first day of trying to follow the services notes (and, like Dave,
spending at least 3 hours just trying to undo the 3 heatshield bolts - 1 of
which stripped itself), the most expedient way of progressing does seem to be
(to me):
1. Disconnect all feeds to the turbo assembly. Label well. You will need to get
the metal coolant connectors completely disconnected (at both ends)
2. Disassemble the bottom half of the turbo exhaust including the downpipe. You
can do the job with downpipe in place but removing that part gives a lot more
wiggle room!
3. Remove the exhaust manifold from the block
4. Remove turbo assembly including manifold (note: VERY heavy - much
heavier than it looks!).
5. Take that sucker apart. It should now be vaguely possible to access some of
the manifold bolts.
I took advice and although all of my gaskets looked sound I decided to replace
all 4 from the assembly (manifold, turbo, exhaust elbow, downpipe) and a good
number of the bolts/studs were past their best, so I again replaced all bolts.
These parts came to about ?80 from various Lotus dealers (I used Bell &
Colvill and SJS Sportscars).
Basically it's a long, difficult job for the amateur and at times can be
disheartening/frustrating as it can be difficult to know what to do next, and
the effort involved can seem extreme. Don't know if the end result was worth it
as I'm waiting for injectors and Unichip before opening the thing up...also I
have got the parts for a complete suspension overhaul/upgrade waiting to go on
and I need to do this soon as my rear wishbones are in a bad way.
Still, congrats again Dave and excellent write up. --Philbo