Changing Your Front Brake
Pads (and Rotors)
This procedure runs through changing the front brake pads
and rotors on your Elan.
This material contained
on this page is informational in nature only, and does not imply all knowledge
needed to safely work on the braking system of your Elan! I will not warranty
the contents nor will I take responsibility for your actions if you should
attempt to work on your Elan's brakes based solely on these instructions. See DISCLAIMER!
Brake pads may contain Asbestos
dust which can cause cancer, and proper mask/ventilation should be followed.
- Front brake pads (4 of them)
- Front rotors (2)
- Brake fluid (maybe)
- "Elan front brake pad pin/spring set"--Lotus
part #A100J6085S
Tools Needed
- Protective gloves
- Jack and jackstands
- Wheel lug wrench
- Torque wrench (recommended and worth buying!)
- A 4mm hex wrench
- "Liquid Wrench" or other loosener of stuck bolts!
- A "pin drift", nail-set, or other small tamp device - Important
- "turkey baster" (read on!)
- caliper piston pusher (see local auto store)
By the way, this would
be a very good time to also bleed
or flush you brakes--also you could paint
your calipers, check your rear
bearings, and rotate your tires if needed.
Removing Old Parts
- Park car on level ground! Or, even better, put
it up safely on a proper car lift.
- Loosen all of the lug nuts just a bit only before raising the car.
- Then put the tranny in neutral and the parking brake on TIGHTLY!! (block
the rear wheels)
- Jack the two front sides of the car up and place a jackstand under each
of the inner jackpoints.
- Remove the front wheel on the side you wish to work on. Be careful
not to set it as to scrape its face.
- Grab the hub and manually turn the front steering rack toward the side you are working on to help
your access and visibility. The hubs can be turned back and forth by hand
as the front end is off the ground.
- To remove the pads, simply remove the two round pins holding them in
place! Be careful not to damage these pins (this can be difficult if the
pins are not in good shape)! The sliding action of
your pads depends on them moving over these 2 pins. If in question
replace the pins! (order: "Elan front brake pad pin/spring set"--Lotus
part #A100J6085S [cheap] ). Do not hit the ends of the pins too hard or you may
deform them and make it difficult or impossible to remove or re-install
them. I would recommend to replace them as my experience has shown the old
pins will not be in good enough condition and with new pins you can be
sure they work as designed. The pins can be hit out either side.
- The pads may be withdrawn after the pins are removed. Pull them outward
to remove--you may need to push the caliper in or out to help take the
pressure off the pad you are removing. Some pads may have attached to them
or separate spring-type devices--be sure you know if the pads you are
installing have them or need them.
- Push back the caliper piston. You may need some
"caliper pliers" to do this properly. You could just pry it back
with a screwdriver but you could bend or scratch things that way! Pushing
back the caliper piston will put more brake fluid back up into the
reservoir--you may need to siphon off a bit to keep it from overflowing!! (Now
you understand the "real" use for a "turkey baster"!)
- [Philip
Johnson wrote to say, "I did not find it necessary to
remove the brake caliper to remove the brake disk (rotor). As the caliper
is of the floating variety, there was enough movement to allow safe
removal of the disk (rotor) and refitting of the new disk so long as the
pads are fully removed, and thus there was no danger of pulling or
stretching the brake lines as the caliper stayed in place.]
- Clean up your caliper--get all the dust and grime off it so it will
function better (use some "brake cleaner spray"--even better use
a lot with an old toothbrush).
- To remove the rotor you must take out the 4mm hex-head retaining screw.
The rotor should now pull straight off.
**This Hex bolt is notorious for
rusting in place and not wanting to come out. The head can break off, so
be prepared to use a can of "rust breaker" to help get it out.
The bolt is not "essential" and you can drill it out or even
replace the rotor without it if you have to. You will not be the first to
do this!**
I should mention here to check your
rotor for proper: thickness / surface condition / and run-out
if you are not changing it!
O.E. Front Rotor Specs:
- Thickness 24.0 mm
- Minimum regrind thickness 23.0 mm
- Minimum thickness (wear limit) 22.0 mm
- Maximum run-out (installed) 0.10 mm
- Maximum run-out (removed) 0.03 mm
Fitting New Parts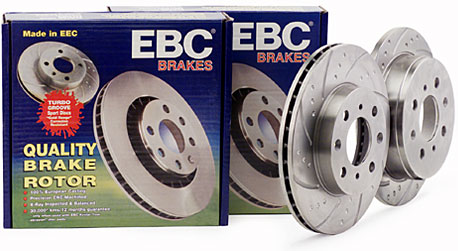
**Here I am writing this for installing new
rotors (factory original or EBC
grooved ones) and for EBC
Greenstuff pads. As mentioned above, other pads may have retaining clips or
springs that must be addressed too.
- Place the rotor onto the hub and secure it with the 4mm hex screw.
IMPORTANT: the EBC discs are "sided", meaning there
is a proper "left" and "right"!! This IS marked on the
box. (The grooves should spiral outward as the hub turns as in forward
motion) Stock rotors are not "sided."
- Place the new pads into the caliper (no they are not "sided")
and be sure the correct side is facing the rotor!!--again this has been
botched by even some of the best mechanics. You may have to pull the whole
caliper out a bit to create enough room for the outer pad. Be
patient and do it carefully.
- Now you can insert the new pins through the pads. The EBC pads can be
installed without the stock springs, but I found when I did this I
occasionally heard the pads rattle a bit over rough roads, so I now have
put the EBC pads in with the O.E. springs from the "pin/spring
kit" and the rattle is gone. I have seen mechanics place a glop of grease
between the pad and caliper to stop this type of rattle, but it is not
necessary if you use the springs. See the Online
Elan General Service Manual
(section
JE) for pictures of these parts and set-up. Be sure the pins
are clean and smooth and straight before you insert them--I put a
very light dash of white lithium grease on the center area of the pins to
help the pads slide over them when in use.
- Double check to be sure you did everything right and the pads are facing
the right direction!
- Now is a good time to bleed the brake caliper if so desired -- I
recommend it as it is easy if you have the right tools!
- Re-mount the wheel and tighten up the lug nuts (59 - 65 lb./ft. = 80 -
88 Nm).
- Check the brake fluid level.
- Important: Pump the brake pedal a few times to restore the caliper pistons to their
working places; then recheck the brake fluid and add as needed.
- Assure the brake reservoir lid is on, and all was done according to
plan! Then put the car back on the floor carefully.
Getting the most from your
new brakes!
This is paraphrased from my mechanic:
"I have had experience with EBC pads
for the last 10 or 15 years. EBC pads work well but need to be
"bedded" and "cured" properly right away to get the most out
of them. To do this you must take your car out and give the brakes a big
workout! Do about 10 "full power" stops from a good speed
(40-60) one after another down to about 5MPH. The goal is to get the pads bedded into the
rotors and to heat up the pads to max temp. There could be a bit of smoke
coming from the pads if you do this properly!! This will allow the pads to cure
properly. Then just drive regularly for a while to allow them to cool properly."
Have fun saving money and learning about your Elan.
Let me know if I should add anything else.
Happy
Elaning, Doug
 (see parts
info)